
Quick Summary
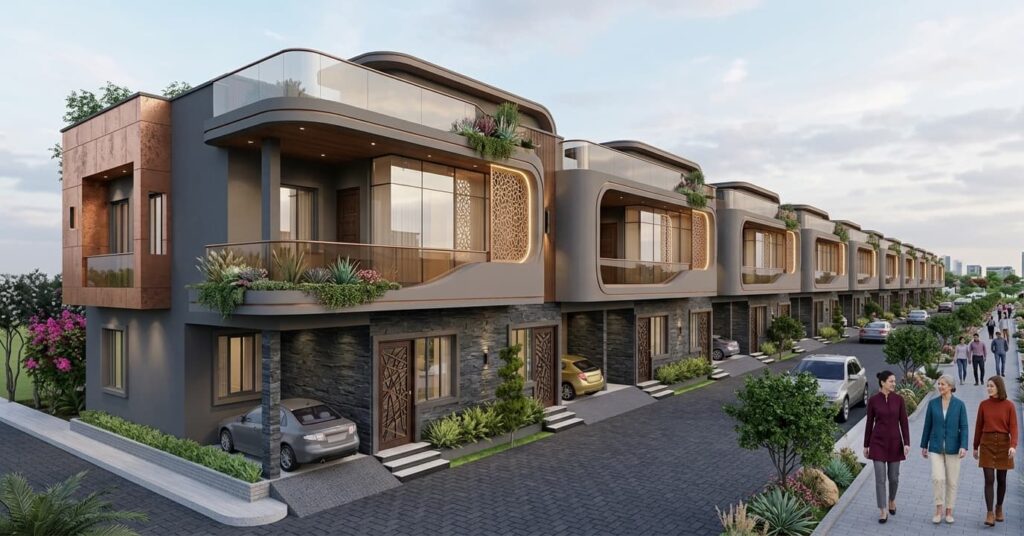
Buying a villa involves inspecting independent foundations, roof access, boundary walls, and plot-to-construction ratios. This guide provides a detailed physical inspection checklist, covering structural construction quality, natural ventilation, utility infrastructure, and developer validation to help buyers make secure and informed investment choices.
Why a Structural Site Visit Checklist is Essential for Villa Buyers
How does buying a villa differ from buying an apartment?
Purchasing a villa involves a fundamentally different set of technical parameters compared to buying a standard apartment. When you buy an apartment, you acquire undivided share of land with shared structural responsibilities managed primarily by a housing society. In contrast, purchasing a villa means acquiring sole ownership of both the land parcel and the independent structure built upon it. This independence shifts the entire burden of structural maintenance, foundation strength, roof waterproofing, and external boundary management directly onto you.
A physical inspection of a villa must focus on factors like soil settlement, independent load-bearing walls, structural columns, and setback areas. Setback areas represent the open spaces required around the villa boundary. If these setbacks are violated during construction, local municipal bodies can issue demolition orders. Therefore, evaluating the physical plot boundaries during a personal visit is a non-negotiable step to protect your wealth.
Why is physical inspection irreplaceable in the digital age?
Virtual tours, three-dimensional renders, and drone videos offer highly curated perspectives of a property. They often mask underlying architectural errors, poor concrete finishes, surrounding low-lying areas prone to waterlogging, or low-voltage power lines running dangerously close to the terrace. A physical site visit allows you to feel the actual space, observe the layout of neighboring plots, check natural wind patterns, and hear the actual noise levels from nearby traffic corridors.
Visiting the actual physical site is the only reliable way to check the actual quality of raw materials used in construction. Heritage Prime recommends that prospective buyers physically walk through the layout to check for hairline cracks, wall dampness, and misalignment in window frames. This process helps buyers separate marketing promises from structural reality.
Phase 1: Pre-Visit Research and Preparation
What documents should you review before visiting the villa site?
Before stepping foot on the physical site, a thorough document review establishes the baseline for your inspection. Request the master plan of the entire gated development, individual villa layout approvals, and environmental clearance certificates. You must verify that the land parcel is non-agricultural and has been legally cleared for residential construction. Checking the master plan helps you cross-reference whether the green belts and open parks promised in brochures are legally designated as such on the sanctioned map.
Reviewing the sanctioned layout plan allows you to match the physical plot sizes with the registered dimensions. Pay close attention to the floor space index details and the approved height of the structures. Any deviation between the approved municipal drawing and the physical building could lead to future legal disputes and make it difficult to obtain a formal completion certificate.
How do you verify the developer credentials and track record?
Investigating the past performance of the builder is a primary risk mitigation strategy. Look at the timeline of their previous deliveries, the longevity of their older structures, and their financial stability. Working with an experienced builder who maintains a legacy of trust in home construction ensures that high engineering standards are maintained throughout the design phase.
Visit older residential developments built by the same firm to observe how well those properties have aged over five to ten years. Look for common signs of poor construction like peeling plaster, structural cracks in basement retaining walls, or broken sewage networks. This external assessment reveals whether the developer uses premium raw materials or compromises on structural quality after selling the units.
Phase 2: Analyzing the Location, Connectivity, and Neighborhood
What external factors determine the long term appreciation of a villa?
The appreciation of an independent residential unit depends heavily on its geographical coordinates, the quality of surrounding road networks, and planned public transport systems. Unlike apartments where values are tied to shared community assets, villa value is heavily influenced by land appreciation. For instance, prospective buyers looking at luxury independent villas in Noida must evaluate the proximity of arterial expressways, upcoming metro corridors, and high-capacity commercial developments.
Examine the zoning laws of the surrounding area. If the adjacent plots are zoned for high-rise commercial structures or industrial facilities, it could severely degrade your privacy, block your view of the sky, and generate persistent noise pollution over the years. Private residential zones remain the ideal choice for long term value preservation.
How do you assess neighborhood safety, traffic patterns, and local infrastructure?
To truly understand the neighborhood, visit the site at different times of the day. A morning visit will show you the pattern of local commuter traffic and ease of exit onto the main road. An evening visit will reveal the presence of streetlights, active security patrols, and any potential safety issues in the immediate area. Drive around the access roads to see if they are wide enough to accommodate emergency services like fire engines and moving trucks.
Check the proximity of daily conveniences like grocery stores, healthcare facilities, and educational institutes. A premium home loses its functional utility if residents must drive long distances for basic amenities. Ensure that the surrounding locality does not suffer from chronic issues like seasonal water logging, low water table levels, or regular power grid failures.
Phase 3: Inspecting Villa Architecture, Layout, and Construction Quality
What structural elements demand your attention during a walkthrough?
When walking through the physical structure of a villa, pay close attention to structural indicators like load-bearing columns, expansion joints, and concrete plaster finishes. Check the alignment of the walls using a simple spirit level or plumbing bob if possible. Look for damp patches along the base of the walls, which suggests poor damp-proof course installation during foundation laying. Those who explore properties like the Palm Villas Noida gated community can observe how professional planning incorporates proper setback distances and advanced structural design to avoid these physical defects.
Check the quality of structural joints, concrete pillars, and structural beams. Examine the external plaster finish to ensure there are no hollow pockets. You can test this by gently tapping on the walls in various places. A hollow sound indicates that the plaster is peeling away from the underlying brickwork, which will eventually lead to flaking, paint peeling, and water ingress during heavy rains.
How do you evaluate ventilation, natural light, and ceiling heights?
The physical orientation of the plot determines the availability of sunlight and cross-ventilation. Walk through the main living areas to check if the windows are positioned to capture morning sunlight and direct wind flow. High ceilings are another key indicator of a premium property, as they improve heat dissipation and make living spaces feel open and spacious. Measure the actual floor-to-ceiling height; premium properties should maintain a clear height of at least ten to eleven feet.
Examine the placement of balconies, open terraces, and courtyards. Ensure that these open spaces do not compromise the privacy of adjacent bedrooms. The layout should have a natural flow from public spaces like living rooms and dining areas to private spaces like bedrooms and home offices, maintaining clear boundaries between guest areas and family living spaces.
Phase 4: Evaluating Gated Community Amenities and Common Infrastructures
What shared features make a premium gated community functional?
A premium residential community relies heavily on its shared infrastructure. Walk through the perimeter walls to ensure they are high enough and equipped with active surveillance cameras, motion sensors, and security fencing. Check the width of the internal roads, which should ideally be nine to twelve meters wide to allow smooth two-way vehicle movement and dedicated walking paths for residents.
Evaluate the layout of the clubhouse, gymnasium, parks, and recreational zones. Verify that these facilities are physically built and functioning rather than merely existing as future promises on a master plan. The placement of these shared amenities should be central enough to provide easy access for all residents while being far enough from individual villas to prevent noise disturbance.
How do you inspect water supply, waste management, and power backup systems?
A self-sustaining infrastructure is key to a comfortable living experience. Inquire about the primary water source for the community. Is it municipal supply, borewell water, or a combination of both? Check the presence of onsite water treatment plants and water softening units. Also, ask about waste management systems, including segregated dry and wet waste collection facilities and functional sewage treatment units.
Verify the capacity of the power backup generators. Ensure that the backup system is designed to handle heavy loads, including central air conditioning units and kitchen appliances. Keeping track of the latest property market updates can help you learn how new green technologies like solar power grids and rain harvesting systems are being integrated into luxury housing to lower maintenance costs.
Comprehensive Site Visit Checklist Table
Use this detailed reference table during your physical site visits to record, compare, and analyze the parameters of different villa developments.
| Inspection Category | Key Parameters to Verify | Priority Level |
|---|---|---|
| Structural Integrity | Check for hairline cracks, wall dampness, base plaster hollows, and column alignments. | Critical |
| Plot Boundaries | Verify physical setbacks, wall measurements, and clear land separations. | Critical |
| Ventilation & Light | Evaluate building orientation, ceiling heights, window placements, and wind flows. | High |
| Utility Infrastructure | Check water source, power backup load capacity, and sewage treatment system. | Critical |
| Legal Compliance | Verify RERA registration number, title deeds, and approved layout plans. | Critical |
| Community Security | Inspect perimeter walls, CCTV camera placements, and guard checkpoint functions. | High |
| Internal Road Layout | Measure road widths, checking for clear footpaths and rainwater drains. | Medium |
Phase 5: Legal Clearances and RERA Compliance Verification
How do you verify the RERA registration and sanctioned layout plans?
No real estate purchase should proceed without verifying the project registration on the state RERA portal. Look up the specific registration number to view the sanctioned layout drawings, construction schedule, and legal land records. Check if the project has encountered any litigations or consumer complaints. Verify that the developer has uploaded quarterly progress reports as mandated by real estate regulations.
Cross-reference the RERA documents with the physical reality observed during your visit. If the physical structure has three floors but the RERA layout only shows approval for two, this represents a serious legal violation. Check if there are any mortgages or financial loans secured against the land parcel, which must be cleared by the builder before the sale deed is registered in your name.
Frequently Asked Questions (FAQ)
1. Why is checking structural setbacks critical during a villa site visit?
Structural setbacks are the mandatory open spaces required between a villa and its plot boundaries. Violating these rules can lead to legal penalties and demolition notices from local municipal authorities. Verifying these physical boundary lines on-site ensures your home complies with local building codes.
2. How can I test the construction quality of a villa on-site without technical tools?
You can check construction quality by tapping the walls to listen for hollow sounds, inspecting window joints for gaps, checking structural corners for dampness or flaking, and verifying the alignment of doors. Looking closely at the finish of concrete and paint can also indicate the overall quality of materials used.
3. What are the key infrastructure systems to inspect in a villa community?
Make sure to inspect the power backup systems, storm water drainage networks, community security gates, onsite waste disposal systems, and water treatment plants. A lack of these systems can lead to high maintenance costs and daily inconveniences.
4. How does the orientation of a villa affect its long term utility?
The physical orientation of a villa determines how much natural light and breeze it receives. Proper orientation helps keep energy bills down by utilizing sunlight during winters and natural cross-ventilation during hot summers, which makes the living spaces much more comfortable.